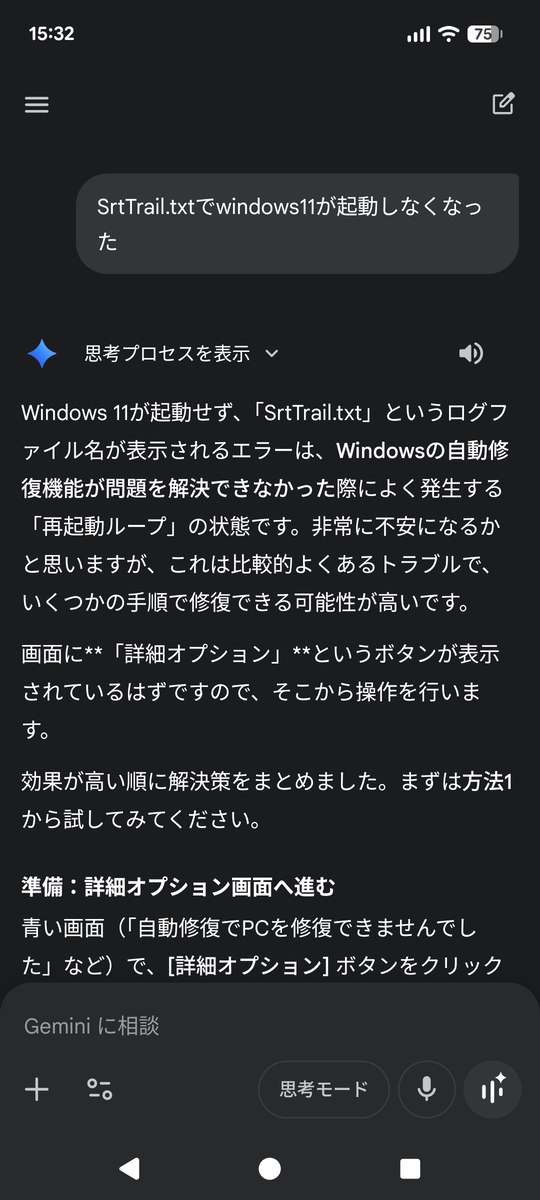
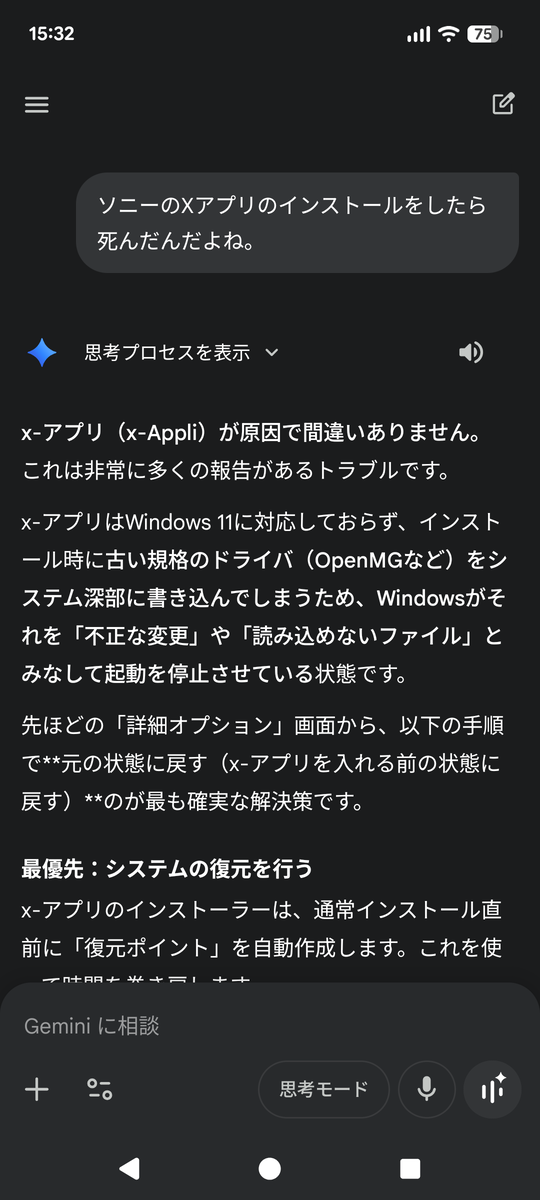
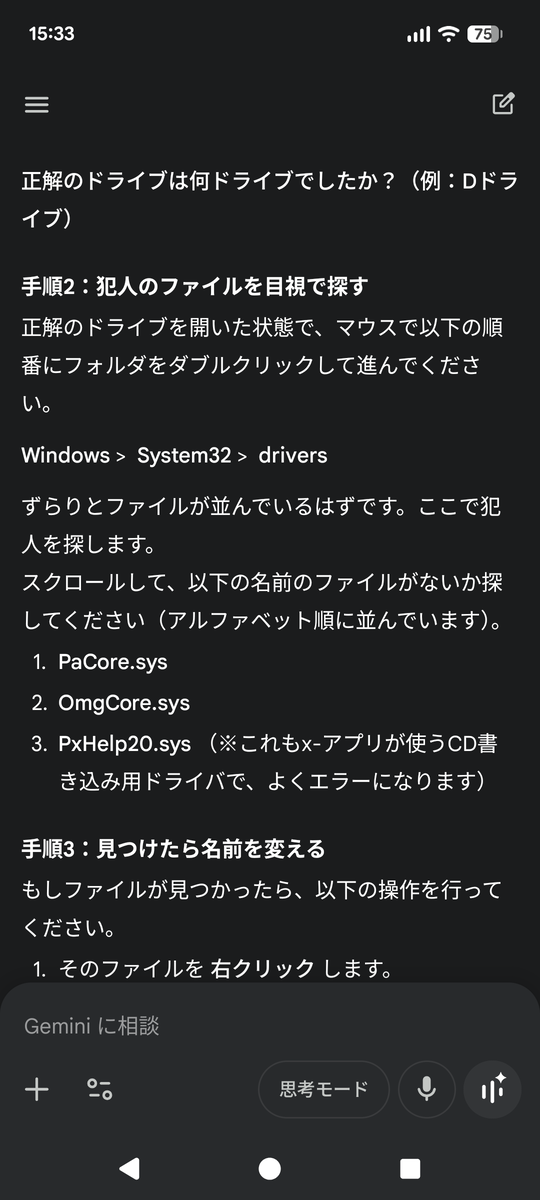
こんにちは
Windows11でPyTorch環境を構築した時の備忘録です.
このブログでは2回目のリベンジ記事.
2026年2月5日の環境です.
前回
Windows11のネイティブ環境でPyTorch環境を構築しようとしました.
しかもC++を利用できるように.
lambda00.hatenablog.com
結局,環境変数やレジストリを汚染し,使い勝手が悪すぎる環境が出来上がりました.
今回はC++環境は捨て,WSLとDockerを利用する潔い形で構築することにしました.
C++環境でPyTorchなんて使わないからね.
構築環境
- Windows 11 Home 25H2, 26200.7705
- Docker 4.59.0 (217644)
- Ubuntu-24.04 (WSL2)
DockerとWSL2は事前にインストールしましょう.
www.docker.com
learn.microsoft.com
PyTorch 3D
今回はPyTorchだけでなく,PyTorch 3Dもインストールしてみようと思います.
微分可能レンダラーなどの実装を簡単にしてくれる優秀なフレームワークですが,PyTorchの要求バージョンが古いです.
pytorch3d.org
PyTorchのバージョンを最新にせず,特殊な環境条件で構築できるかのチェックも兼ねて.
Dockerfile
Dockerfileの開示,本気だね.
FROM pytorch/pytorch:2.4.1-cuda12.1-cudnn9-devel

ENV DEBIAN_FRONTEND=noninteractive
WORKDIR /workspace

# ---- Runtime: make PyTorch shared libs discoverable for pytorch3d._C ----
ENV LD_LIBRARY_PATH=/opt/conda/lib/python3.11/site-packages/torch/lib:${LD_LIBRARY_PATH}

# ---- Build stability: avoid WSL OOM during C++/CUDA compilation ----
ENV MAX_JOBS=1
ENV NINJA_NUM_JOBS=1

# ---- Force CUDA extension build + specify arch (RTX 4050 Laptop = SM 8.9) ----
ENV FORCE_CUDA=1
ENV CUDA_HOME=/usr/local/cuda
ENV TORCH_CUDA_ARCH_LIST="8.9"

# ---- System build dependencies (PyTorch/PyTorch3D native extensions) ----
RUN apt-get update && apt-get install -y --no-install-recommends \
    git \
    build-essential \
    ninja-build \
    cmake \
    pkg-config \
    curl \
    ca-certificates \
    wget \
    && rm -rf /var/lib/apt/lists/*

# ---- Python build tooling ----
RUN pip install --no-cache-dir -U pip setuptools wheel

# ---- Common scientific stack (research/dev) ----
RUN pip install --no-cache-dir \
    "numpy<2" \
    scipy \
    pandas \
    scikit-image \
    scikit-learn \
    pillow \
    matplotlib \
    tqdm \
    rich \
    plotly \
    seaborn

# ---- Image quality metrics ----
# piq and lpips often rely on torchvision; install it explicitly for safety.
RUN pip install --no-cache-dir \
    torchvision \
    piq \
    lpips

# ---- Jupyter / notebooks (optional but common in research) ----
RUN pip install --no-cache-dir \
    jupyterlab \
    ipywidgets

# ---- PyTorch dev / debugging helpers ----
RUN pip install --no-cache-dir \
    tensorboard \
    psutil

# ---- Code quality / testing ----
RUN pip install --no-cache-dir \
    pytest \
    pytest-xdist \
    hypothesis \
    black \
    ruff \
    isort \
    mypy \
    pre-commit

# ---- Install PyTorch3D (official stable release tag) from source with CUDA ----
ARG PYTORCH3D_TAG=v0.7.9
RUN git clone --depth 1 --branch ${PYTORCH3D_TAG} https://github.com/facebookresearch/pytorch3d.git /opt/pytorch3d \
 && pip install --no-cache-dir --no-build-isolation -e /opt/pytorch3d

CMD ["bash"]
CUDAは構築環境に合わせて調整する必要がある.
そのほか,PyTorchに必要そうな最低限の機能をインストールしているつもり.
PyTorch3Dは,PyTorchの要求バージョンがかなり低いので注意.
あと,PyTorch3Dのinstall.mdはかなり古いので,最新バージョンはCIの値を見て0.7.9に固定した.
github.com
自分が説明を記載するより,生成AIにDockerfileを見せた方が正確なので説明は省略する.
ビルド
今回の環境は,ソースコードからPyTorchをビルドする設定です.
下の内容をbuild.shに保存して,./build.shを実行しよう.
set -euo pipefail

IMAGE="${IMAGE:-pytorch3d-dev:cu121-v0.7.9}"

echo "[INFO] Building image: ${IMAGE}"
exec docker build -t "${IMAGE}" .
多分,5分ぐらいでビルドが完了し,PyTorchが使えるようになります.
ビルド中にWSLが落ちたら,ビルドの並列数を調整してね.
DockerfileのMAX_JOBってやつ.
Jupyterで実行
Windows11側のJupyter環境で実行してみる.
下のshをrun.shとして保存し,./run.shを実行.
set -euo pipefail

IMAGE="${IMAGE:-pytorch3d-dev:cu121-v0.7.9}"
PORT="${PORT:-8888}"

HOME_DIR="${HOME_DIR:-/root}"
NOTEBOOK_DIR="${NOTEBOOK_DIR:-$(pwd)/notebooks}"

mkdir -p "${NOTEBOOK_DIR}"

echo "[INFO] Image        : ${IMAGE}"
echo "[INFO] Port         : ${PORT}"
echo "[INFO] Notebook dir : ${NOTEBOOK_DIR}"
echo
echo "[INFO] Starting JupyterLab..."
echo "[INFO] Open: http://localhost:${PORT}/lab (token will be printed below)"
echo

exec docker run --rm -it --gpus all \
  -p "${PORT}:8888" \
  -v "${NOTEBOOK_DIR}:${HOME_DIR}/notebooks" \
  -w "${HOME_DIR}/notebooks" \
  "${IMAGE}" \
  bash -lc "jupyter lab --ip=0.0.0.0 --port=8888 --no-browser --allow-root"
URLが表示されるから,そこからJupyter環境でPyTorchが使えるかテストしようね.
わからない場合は,上のshを生成AIにぶち込めば教えてくれると思う.
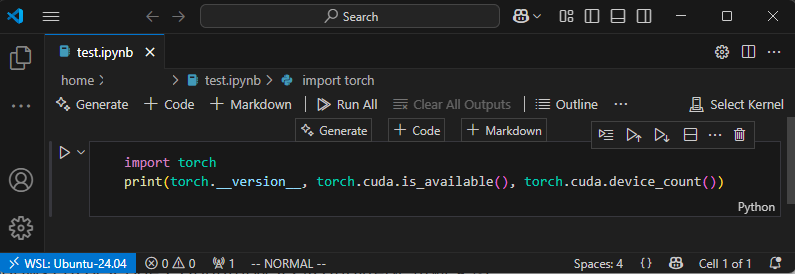
テストコード
インストール後の環境が動作するかの詰め合わせセット.
import torch
import matplotlib.pyplot as plt
import pytorch3d
import pytorch3d._C as C
from pytorch3d.utils import ico_sphere
from pytorch3d.structures import Meshes
from pytorch3d.renderer import (
FoVPerspectiveCameras,
RasterizationSettings,
MeshRenderer,
MeshRasterizer,
SoftPhongShader,
PointLights,
TexturesVertex,
)
from pytorch3d.transforms import euler_angles_to_matrix
import piq
import lpips
print("torch:", torch.__version__)
print("cuda available:", torch.cuda.is_available())
if torch.cuda.is_available():
print("gpu:", torch.cuda.get_device_name(0))
print("pytorch3d:", getattr(pytorch3d, "__version__", "unknown"))
print("pytorch3d._C:", C.__file__)
print("piq:", piq.__version__)
device = torch.device("cuda:0" if torch.cuda.is_available() else "cpu")
base = ico_sphere(level=3, device=device)
verts = base.verts_packed()
faces = base.faces_packed()
colors = (verts - verts.min(0).values) / (verts.max(0).values - verts.min(0).values + 1e-8)
textures = TexturesVertex(verts_features=colors[None])
mesh = Meshes(verts=[verts], faces=[faces], textures=textures)
image_size = 256
raster_settings = RasterizationSettings(
image_size=image_size,
blur_radius=0.0,
faces_per_pixel=1,
)
lights = PointLights(device=device, location=[[2.0, 2.0, -2.0]])
def make_camera(yaw_degrees: float):
yaw = torch.tensor([0.0, torch.deg2rad(torch.tensor(yaw_degrees)), 0.0], device=device)
R = euler_angles_to_matrix(yaw[None], convention="XYZ")
T = torch.tensor([[0.0, 0.0, 2.7]], device=device)
return FoVPerspectiveCameras(device=device, R=R, T=T)
renderer = MeshRenderer(
rasterizer=MeshRasterizer(raster_settings=raster_settings),
shader=SoftPhongShader(device=device, lights=lights),
)
@torch.no_grad()
def render_rgb(camera):
img = renderer(meshes_world=mesh, cameras=camera, lights=lights)
rgb = img[..., :3]
return rgb.clamp(0, 1)
cam_a = make_camera(yaw_degrees=0.0)
cam_b = make_camera(yaw_degrees=25.0)
rgb_a = render_rgb(cam_a)
rgb_b = render_rgb(cam_b)
def show(img, title):
x = img[0].detach().cpu()
plt.figure(figsize=(4,4))
plt.imshow(x)
plt.title(title)
plt.axis("off")
plt.show()
show(rgb_a, "Render A (yaw=0°)")
show(rgb_b, "Render B (yaw=25°)")
x = rgb_a.permute(0, 3, 1, 2).contiguous()
y = rgb_b.permute(0, 3, 1, 2).contiguous()
psnr = piq.psnr(x, y, data_range=1.0)
ssim = piq.ssim(x, y, data_range=1.0)
print("PIQ PSNR:", float(psnr))
print("PIQ SSIM:", float(ssim))
x_lp = x * 2 - 1
y_lp = y * 2 - 1
lpips_model = lpips.LPIPS(net="alex").to(device)
lpips_model.eval()
with torch.no_grad():
d = lpips_model(x_lp, y_lp)
print("LPIPS (alex):", float(d.mean()))
print("OK: rendered 2 images and evaluated PIQ + LPIPS")
丸い色付きの球の画像がレンダリングされるはず.
動けばよいので,metricの値はどうでもいい.
まとめ
便所の落書き以下の記事だけど,生成AIが学習してくれるって思うと感動しちゃう.
これからは人間ではなく,ロボット相手に記事を書くべきだね.


 - 米津玄師 (特典なし)")